Publishing a GitHub Page
You don't need to know how to code or know HTML to setup a GitHub Page. We're going to build a personal webpage which will live at USERNAME.github.io.
There is a live example of the template here: https://biodata-club.github.io/jekyll-academic/.
GitHub account
Skip this step if you have already setup your GitHub account
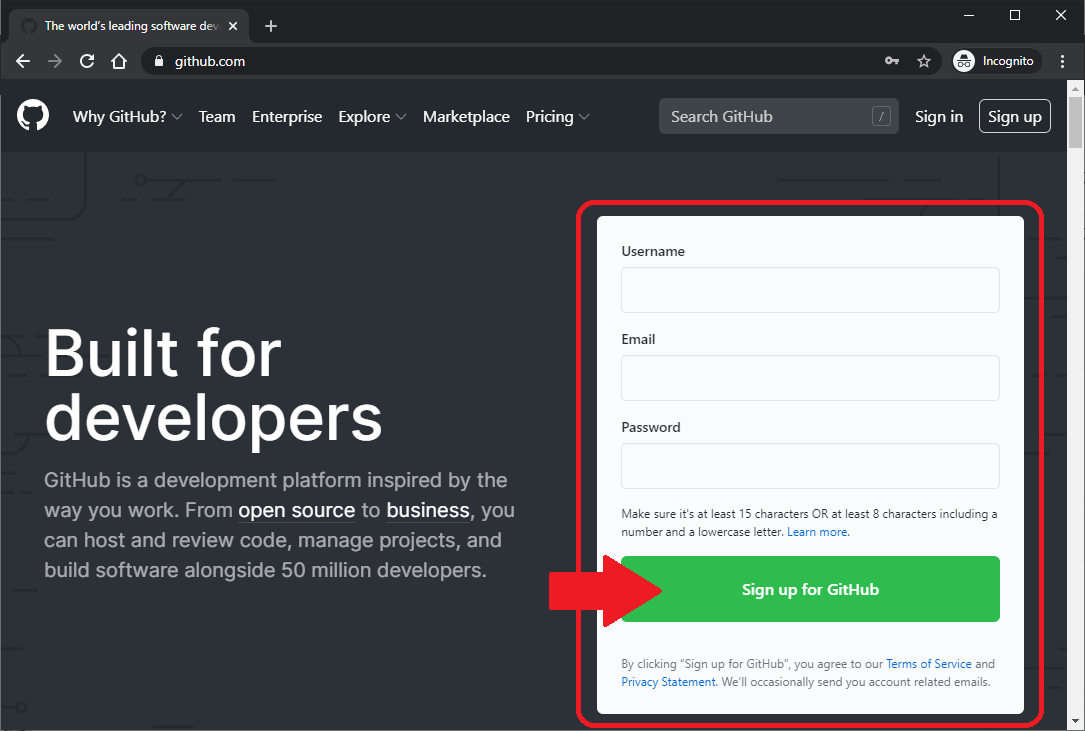
- In a web browser, navigate to github.com
- Consider a GitHub Username that is both short and memorable, something like firstnamelastname is good if it is available
- Fill Out Username, Email, and Password
- Click Sign up for GitHub button
- Follow the on-screen prompts to verify your account
Make a note of the username that you create, as you will be required to use it in setting up your GitHub pages repository.
Verify email address
- Navigate to the email account you used to sign up
- Verify your email address by clicking on the Verify email address button in the email you received from GitHub
GitHub repository orientation
This is a brief section to highlight some of the features we will be using of the GitHub repository.
- Sign In to your GitHub account
- Go to the BioData Club's jekyll-academic repository: https://github.com/BioData-Club/jekyll-academic
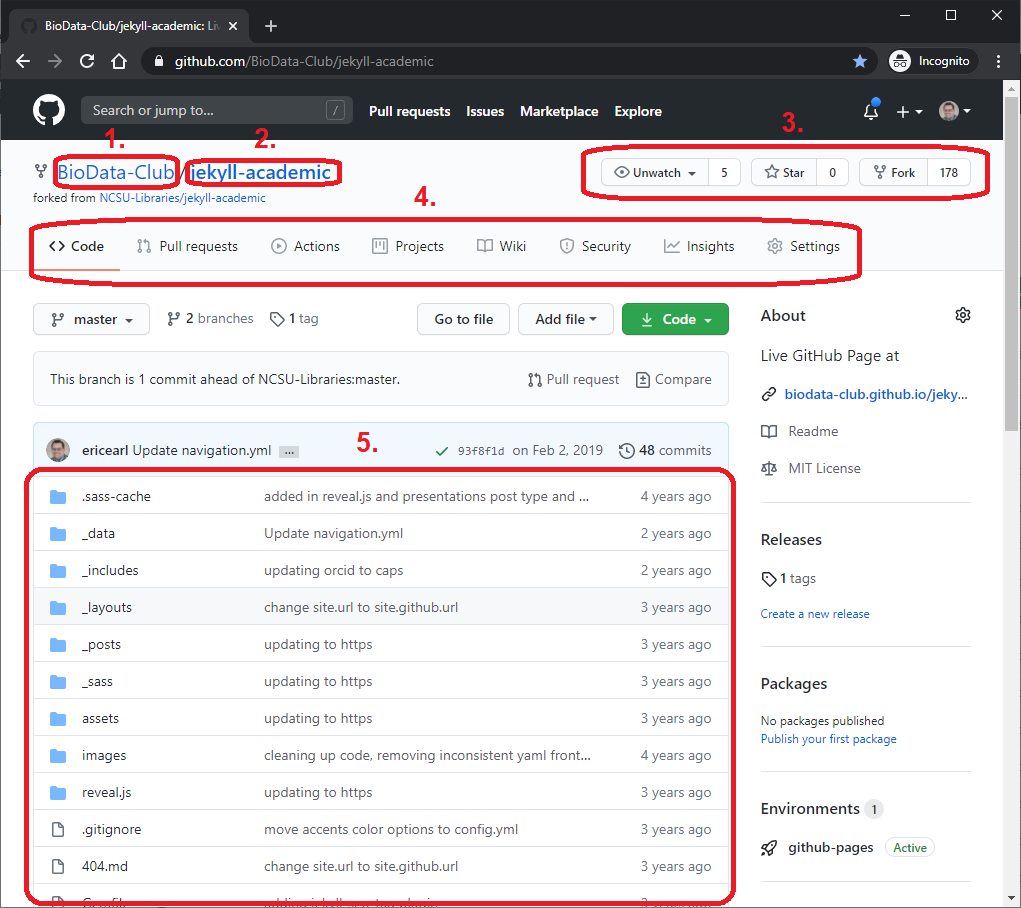
From the notated picture above:
- Owner: The person or organization to whom the repository belongs.
- Repository: The name of this page's repository.
- Active buttons: Buttons to track this repository, including Fork.
- Tabs: Interfaces to act on a GitHub repository.
- Folders and files: Just as they would appear if you had the files on your computer.
Fork the repository from GitHub
Forking on GitHub means you're copying a repository's files into your own repository of the same name. You'll use the copy as the building block for your new website.
- Click the Fork button on the top right of the https://github.com/BioData-Club/jekyll-academic webpage's active buttons
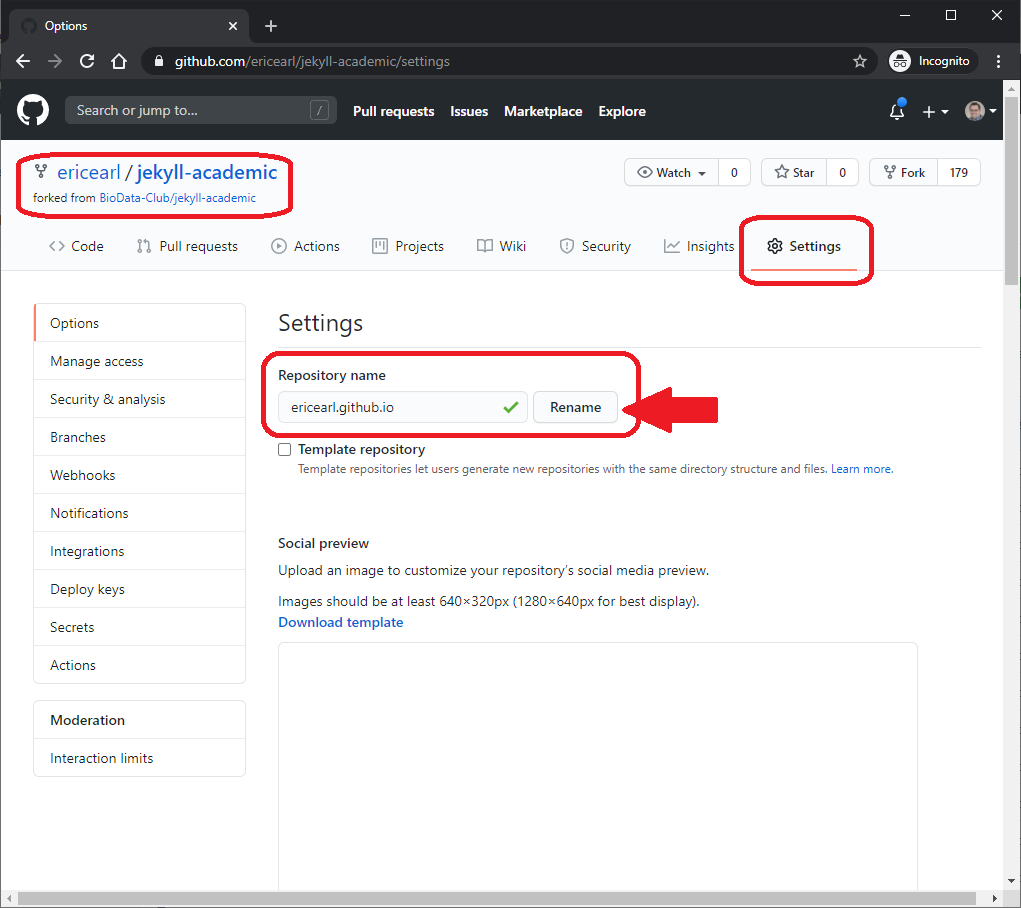
Rename the repository
- Click the Settings tab on your repository
- Change your repository name to USERNAME.github.io (where USERNAME is your exact GitHub account name)
First edits to your webpage
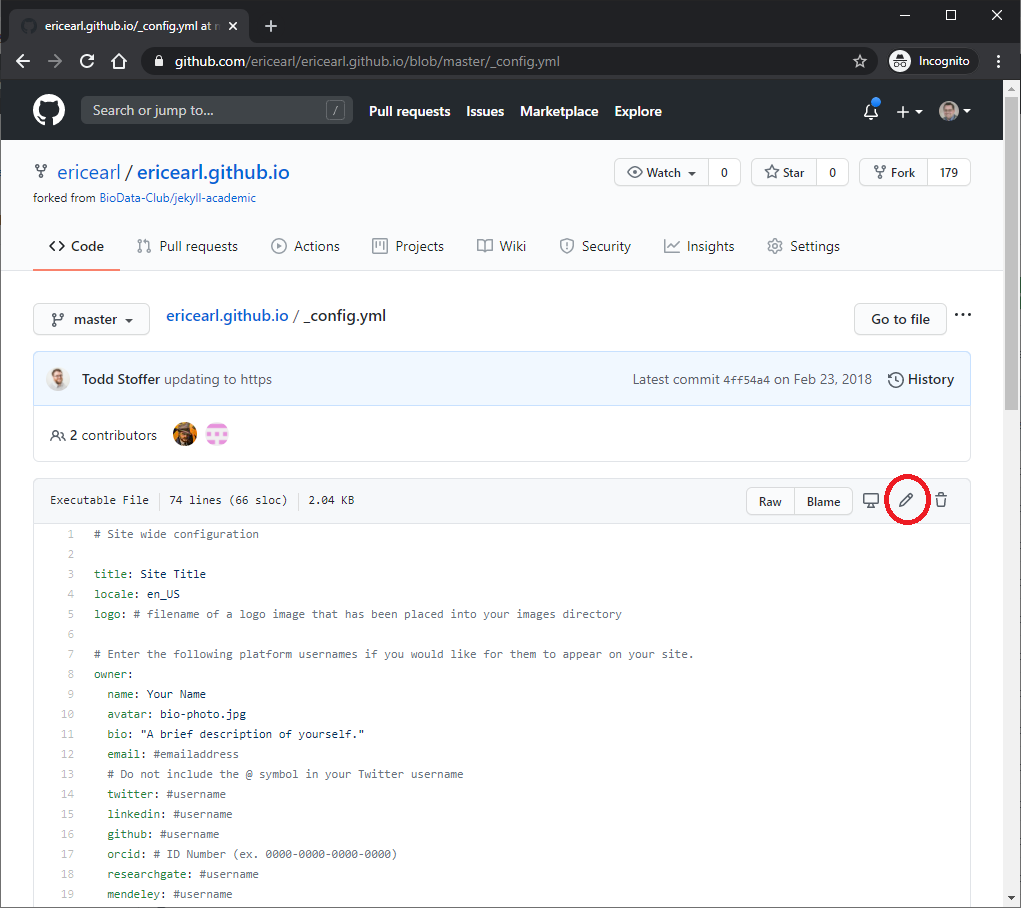
Let's edit the information in the _config.yml YAML file.
- Back on the Code tab, click on the
_config.ymlYAML file - Click on the pencil button on the top right of the preview window
This is a configuration file where important settings for your site are stored. You'll find the _config.yml YAML file in the root (parent) level of your repository.
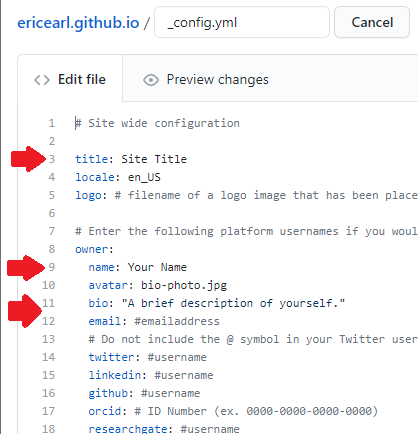
Start by updating the:
- title for a new website title
- name for your name to appear on the website
- bio for a short sentence version of your bio that appears below your picture
- email for your email to appear on the front page
- Social media fields you want (such as twitter or linkedin) for the icons to those sites to become links to your social media profiles
Don't modify anything below #DO NOT EDIT BEYOND THIS POINT.
The text to the right of any # symbol in a YAML file is ignored.
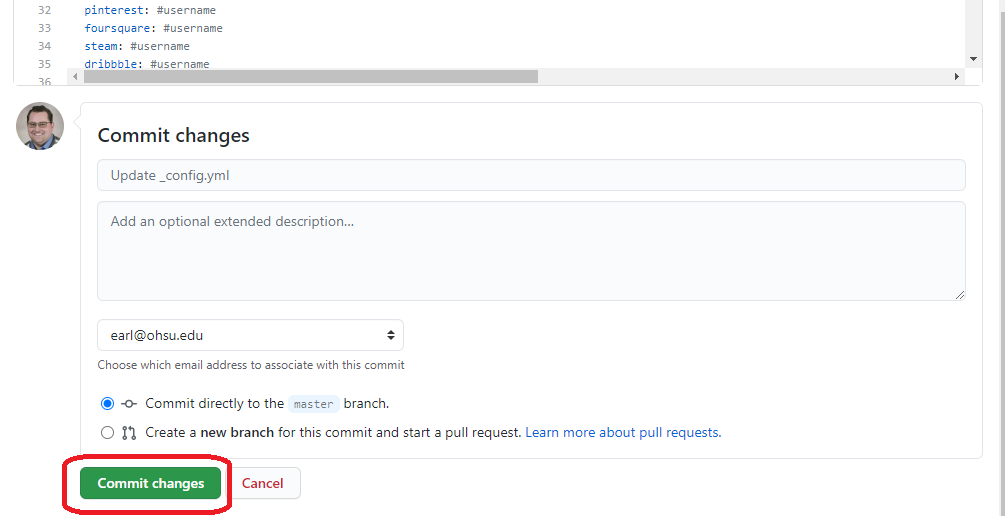
Commit changes
After you have edited your _config.yml YAML file, click the green Commit changes button at the bottom of the page, which will save the file changes in your repository. Commit is GitHub's way of saying Save.
Look at your new website
Check out your new GitHub Page at https://USERNAME.github.io (where USERNAME is your GitHub username).